LinkedIn has evolved far beyond a digital resume repository. Today, it is the premier platform for B2B networking and professional community building. If you are looking to gather like-minded professionals, establish authority, or nurture leads, you might be asking: “How do you create a group on LinkedIn?” Creating a group is straightforward, but building a successful one requires strategy. This complete guide will walk you through the why, the how, and the what’s next of launching a thriving LinkedIn Group.
The Strategic Benefits: Why Start a LinkedIn Group?
Before diving into the technical steps, it is essential to understand the value proposition. Why invest time in managing a community?
Establish Yourself as an Industry Leader
Owning a group positions you (or your brand) at the head of the table. You aren’t just participating in the conversation; you are hosting it. By curating high-quality content and facilitating discussions, you signal to your network that you are a thought leader and a connector in your specific niche.
Build a Targeted Professional Community
Unlike a personal profile where your network can be a mix of friends, colleagues, and recruiters, a Group allows you to curate a specific audience. Whether it’s “Storytelling for Brands” or “SaaS Marketing Professionals in Vietnam,” a group ensures that every member shares a common interest and professional goal, leading to higher relevance and engagement.
Generate Leads and Drive Brand Awareness
A LinkedIn Group is a powerful top-of-funnel asset. It allows you to nurture potential clients in a low-pressure environment. By solving problems and adding value within the group, you build trust. When members eventually need a service you offer, your brand is already top-of-mind.
Gather Valuable Market Insights and Feedback
Your group is essentially a focus group that never sleeps. You can use it to test new ideas, ask for feedback on content, or simply listen to the challenges your peers are facing. These insights are gold for refining your business strategy and content marketing efforts.

How to Create a LinkedIn Group (Step-by-Step)
You are ready to launch. Here is the answer to how do you create a group on LinkedIn, broken down into actionable steps.
Step 1: Access the ‘Groups’ Hub on LinkedIn
Log in to your LinkedIn account. On the homepage, look at the left-hand sidebar (on desktop). You will see a section titled “Groups.” Alternatively, click the “Work” icon (the nine-dot grid) in the top right navigation bar and select “Groups” from the menu.
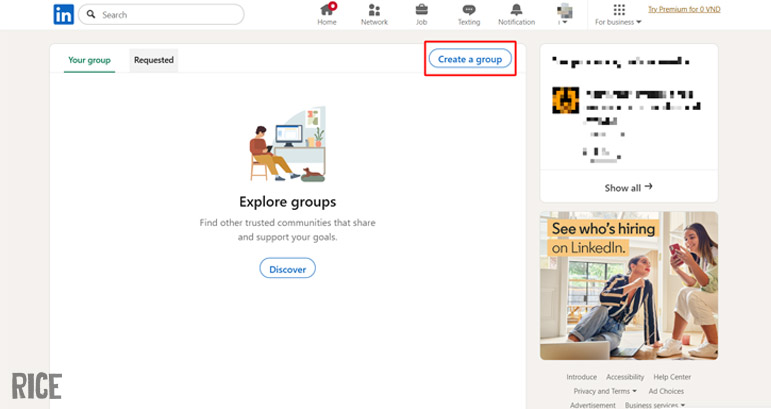
Step 2: Click the ‘Create group’ Button
Once you are in the Groups hub, you will see a list of groups you are already a member of. Look for the “Create group” button, typically located in the top right corner of the main content area. Click it to open the creation form.
Step 3: Fill in Your Group’s Details (Logo, Name, Description)
This is the most critical step for SEO and discoverability.
-
Logo/Cover Image: Upload a professional square logo (maximum 60×60 pixels) and a cover image (1776×444 pixels) that represents your brand or community theme.
-
Group Name: Be specific. Instead of “Marketing,” try “Content Marketing Strategies for B2B.“
-
Description: clearly state who the group is for and what value they will get. This text is searchable, so use relevant keywords.

Step 4: Define Your Group’s Industry and Location
LinkedIn allows you to tag your group with up to three industries. Choose the ones most relevant to your target audience. You can also add a location if your community is geographically specific (e.g., “Digital Marketers in Ho Chi Minh City”).

Step 5: Set Group Rules and Permissions
A group without rules can quickly become a spam magnet.
-
Rules: clearly state that self-promotion, spam, or disrespectful behavior is not allowed.
-
Permissions: Decide if members can invite others or if only admins can approve new members. It is highly recommended to require admin approval for all posts initially to maintain quality.
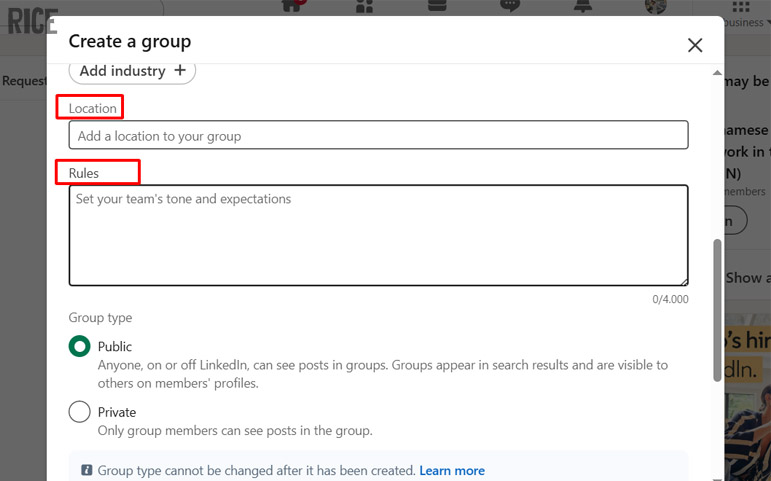
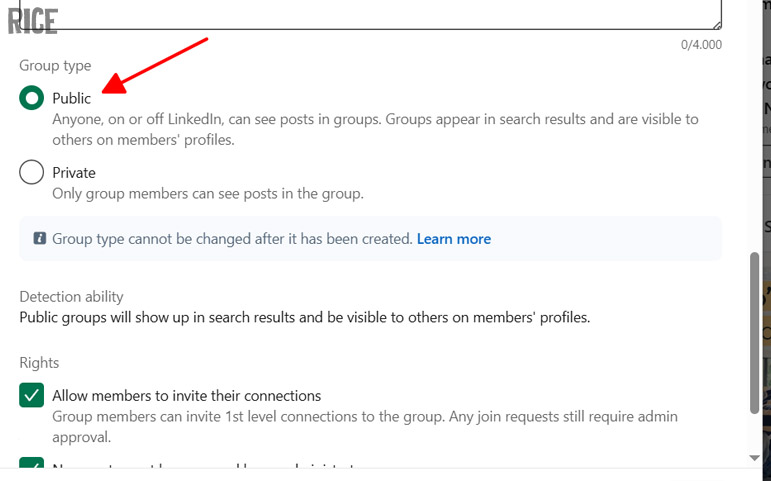
Step 6: Choose Your Group’s Privacy (Listed vs. Unlisted)
You have two main choices here:
-
Listed (Standard): The group appears in search results, and anyone can view the group profile and request to join. This is best for growth.
-
Unlisted: The group does not appear in search results. Membership is by invitation only. This is ideal for private mastermind groups or internal company communities.
Step 7: Create Your Group and Send Initial Invitations
Click the “Create” button. Congratulations, your group is live! Now, LinkedIn will prompt you to invite connections. Start by inviting a small “seed” group of trusted colleagues or industry peers who you know will engage and help set the right tone for the community.
Your Group is Live! What’s Next? (Tips for Growth and Engagement)
Creating the group is just the beginning. The real work is keeping it alive.
Create a Pinned Welcome Post for New Members
Don’t let new members walk into an empty room. Write a pinned post that welcomes them, reiterates the group’s purpose, and asks them to introduce themselves in the comments. This breaks the ice immediately.
Actively Moderate Discussions and Member Requests
Check your group daily. Approve relevant member requests promptly and delete spam without mercy. A clean, spam-free environment is the number one reason professionals stay in a LinkedIn Group.
Start Conversations with Polls, Questions, and Relevant Articles
Do not just post links to your own blog. Use LinkedIn Polls to generate quick engagement. Ask open-ended questions about industry trends. Share third-party articles and add your own perspective. The goal is to spark discussion, not just broadcast information.
Promote Your Group on Your Profile and in Your Content
Feature your new group in the “Featured” section of your personal LinkedIn profile. Mention it in your posts (e.g., “We were discussing this topic in my group, [Group Name], yesterday…”). Cross-promote it in your email newsletter to bring your existing audience into the fold.
See More:
- How to See Who Shared Your Post/Reel on Instagram: The Complete Guide for 2025
- How to Tag Someone on Instagram: The Complete Guide (2025)
- The Art of Storytelling: 5 Common Mistakes And How to Fix Them
Ready to build your community? Now that you know exactly how to create a group on LinkedIn, the only thing left to do is take action. Start today, and turn your network into a true community.